Despite the perils that are currently besetting the social media platform, Twitter is at the centre of the public promotion and discussion of science. Since the onset of the COVID-19 pandemic, this value has only increased in my field of virology where the public, media, and experts engage on hot button topics. It is also where new articles and preprints are circulated and discussed. Exposing students to this discourse can have tremendous value to students, who can get a broad overview of a field and where it is heading, to hear from key stakeholders, and even identify job opportunities. There is also a learning opportunity for students to be able to discern the wheat from the chaff, and engage their critical thinking skills.
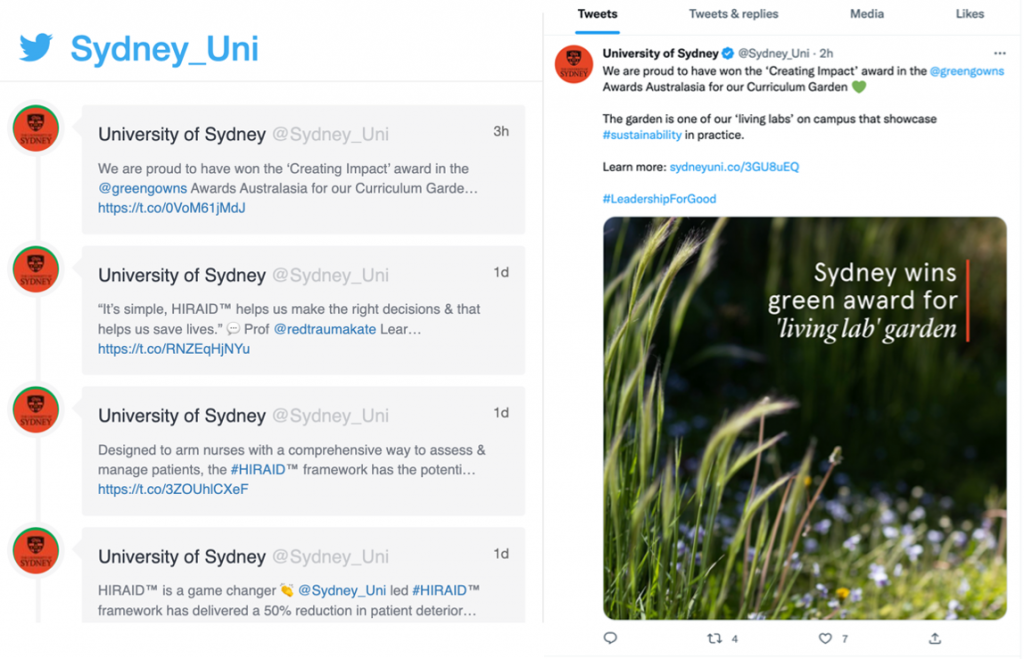
Canvas has an external Twitter App that can be installed in the Settings page. Tweets are displayed by either following an account (@) or a hashtag (#). The problem is that the resulting embed looks terrible; compare Canvas embedded Twitter (left) to the native site (right) for the @Sydney_Uni account. Tweets are curtailed, images are not displayed and, for any value, students are required to navigate outside of Canvas. An abomination.
But there is a better way. There’s a little extra set-up work but the solution will then be substantially hands-off and be a great value-add for your course.
Tailoring your twitter feed
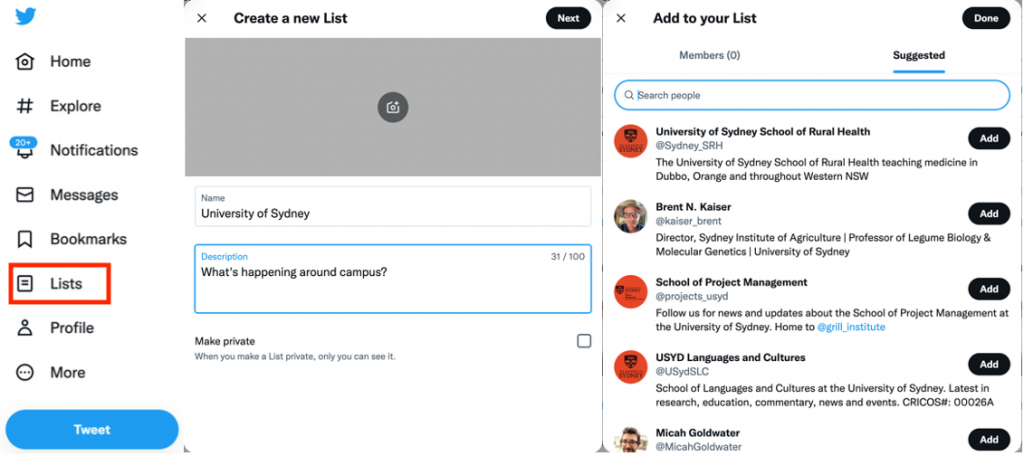
Now it is a good time to consider that content you would like to present to your students. A versatile approach is to generate a List from a Twitter account. Upon logging into Twitter (and you will need a Twitter account), generate a new List and add accounts to this list (Manage members). Posts from members will generate the timeline presented in Canvas. This provides a far greater degree of control than simply following a hashtag or a single account. In a virology course that I coordinate, I added some University of Sydney accounts, a handful of microbiology societies, prominent science journalists, and a range of Australian and international scientists. Scientific journals often have accounts you might also like to consider.
Displaying your new feed
 Now that you have selected your content, the next step is to trick Canvas into presenting this content on a page. All you will need at this stage is a link to the List (circled, Copy link to List).
You will now want to publish List timeline.
In the customisation options, you can set the Height and Width in pixels, I generally set the width to 500 px, whilst leaving the height as it is constrained in a later step.
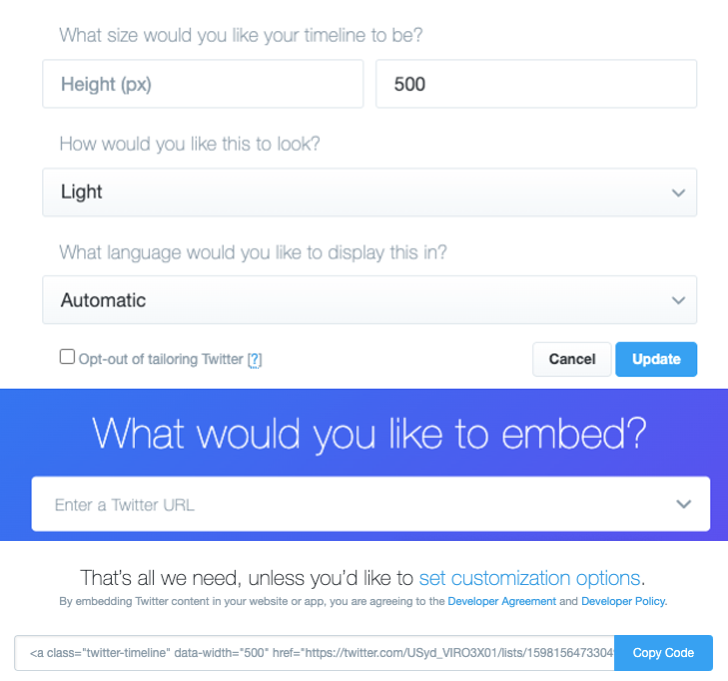
Now you’ve got your code. So, copy it by clicking on the plus button below!
Now, it’s off to create a GitHub account, where you will “Create a new repository”.

And then “create a new file”.

This code must be named “index.html”.
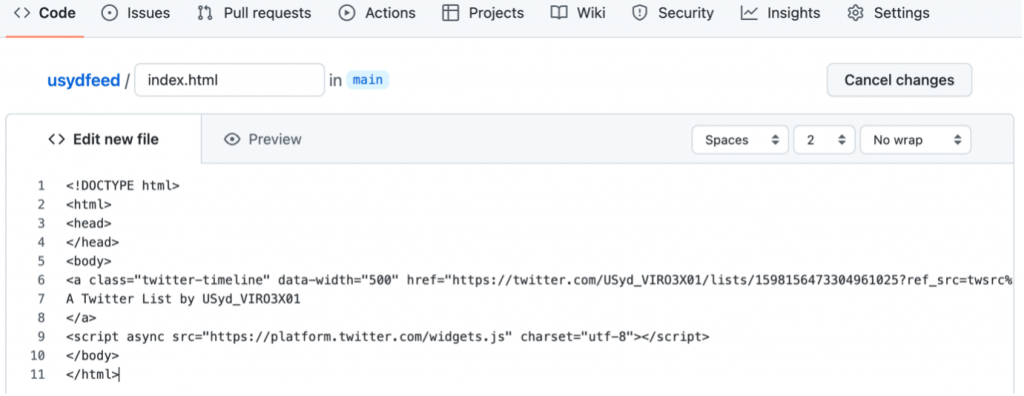
Here is the code you want to add, with the bolded section directly taken from published List above.
<!DOCTYPE html>
<html>
<head>
</head>
<body>
<a class=”twitter-timeline” data-width=”500″ href=”https://twitter.com/USyd_VIRO3X01/lists/1598156473304961025?ref_src=twsrc%5Etfw”>
A Twitter List by USyd_VIRO3X01
</a>
<script async src=”https://platform.twitter.com/widgets.js” charset=”utf-8″></script>
</body>
</html>
Now, commit the file (green button at bottom of page).
Navigate to “Settings” and then “Pages” to pick up the link for your site. You need to “Deploy from a branch”, and then select the “main” branch from “/(root)” and then “Save”. Wait a few minutes and then refresh the page until your site is live and the “github.io” link is visible.

In Canvas, you will want to open the page where the twitter feed will be embedded, and edit the HTML code. Paste in the following code:

The bolded section is captured from your live site in Github and you can set the formatting of the feed by width and height.
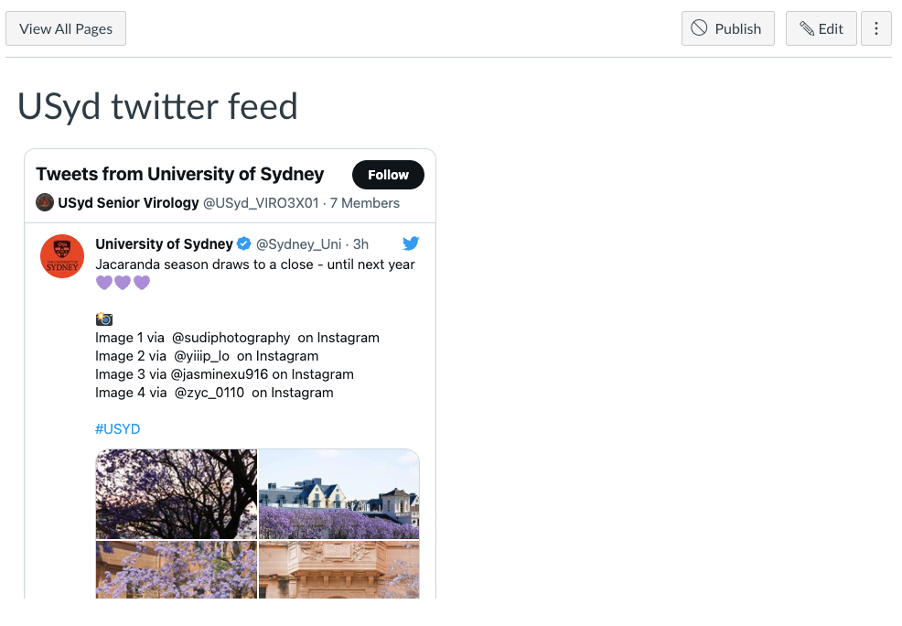
This is what the finished product looks like! Your only maintenance of this feature is to add/remove members from your Twitter List.
