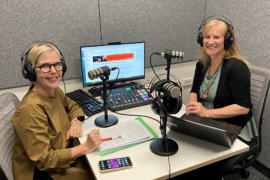
Have you ever wondered what students are doing when they are working in groups in the classroom? Sure, you can visit individual groups in class or breakout rooms in Zoom -one by one- to interact and give feedback, but how do you know which groups are more in need of your feedback than others?
Unfortunately, by the time you come around to checking in on them, valuable learning time has passed. This article suggests one possible approach for handling this situation and driving better student interaction and engagement using Miro, a collaboration platform.
Using Miro in class
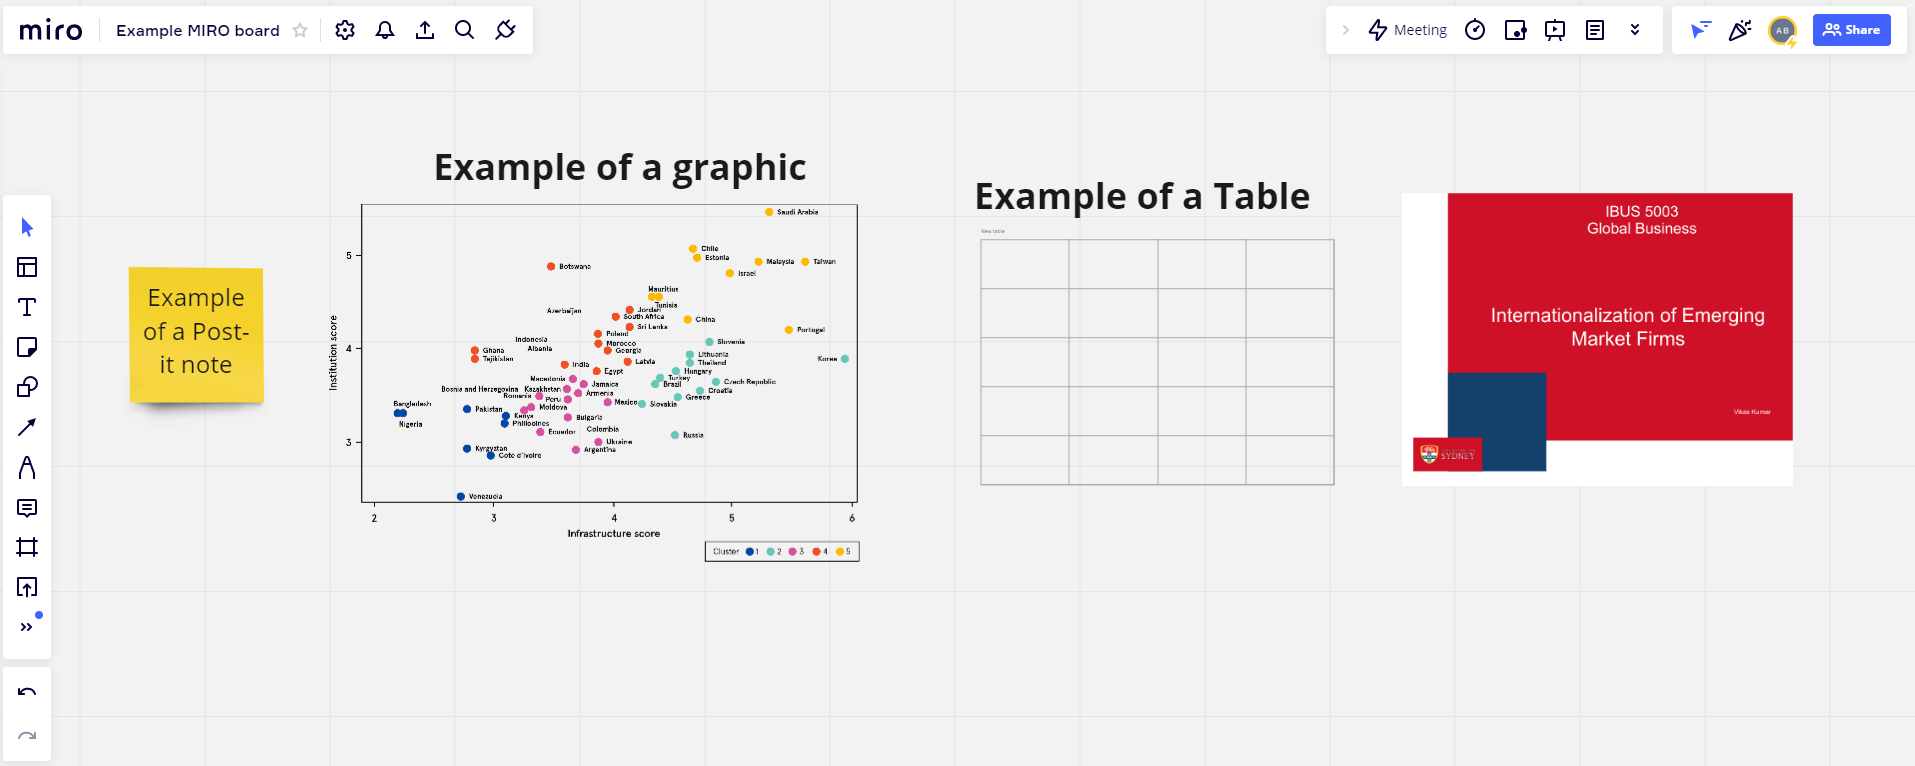
With Miro, it’s possible to easily and quickly monitor multiple groups at scale. Initially created as a design thinking tool where teams can interact and share ideas on a large canvas, Miro offers a vast space where users can share post-it-notes, documents, pictures and tables. Educators can make use of this by pre-populating a Miro board with instructions and slides replicated in groups, that scaffold classroom activities to guide student interaction.
Teachers can scale out to a birds eye view by setting the zoom level so that multiple breakout rooms can be seen at once. This way it is easy to spot that Group 3 may need a nudge, that Group 2 are falling behind the others, or that it’s almost time to wrap up an activity as all groups are working on the final task.
But not only is Miro a tool for educators, it’s also highly engaging for students. Students can work collaboratively with peers and their Miro board provides a record of their in-class work that they can revisit later. In student evaluation surveys of the case study described below, run over two semesters as part of the Connected Learning at Scale (CLaS) project, 78% of responding students reported that they found Miro helpful to their learning.
Miro isn’t the only visual collaboration tool on the market, and you may be wondering why you’d use it over
another similar tool like
Padlet. Other EdTech tools are great for one-off activities, but Miro can support a sequence of activities or even a whole semester of classes all in the one place. The platform has been built for design thinking and flexibility, so provides more options both for educators designing activities and for students in completing them. It’s also easy to add additional resources, like Powerpoint slides, so your students have everything they need in the one place. Finally, it’s easy to copy sections of Miro boards and entire boards to reuse your activity templates across classes and semesters.
Case study – INFS5002
Faced with the situation described above, we used Miro with the support of the Business Co-Design team to create an engaging student learning experience for an entire semester in INFS5002 Foundation in Business Information Systems.
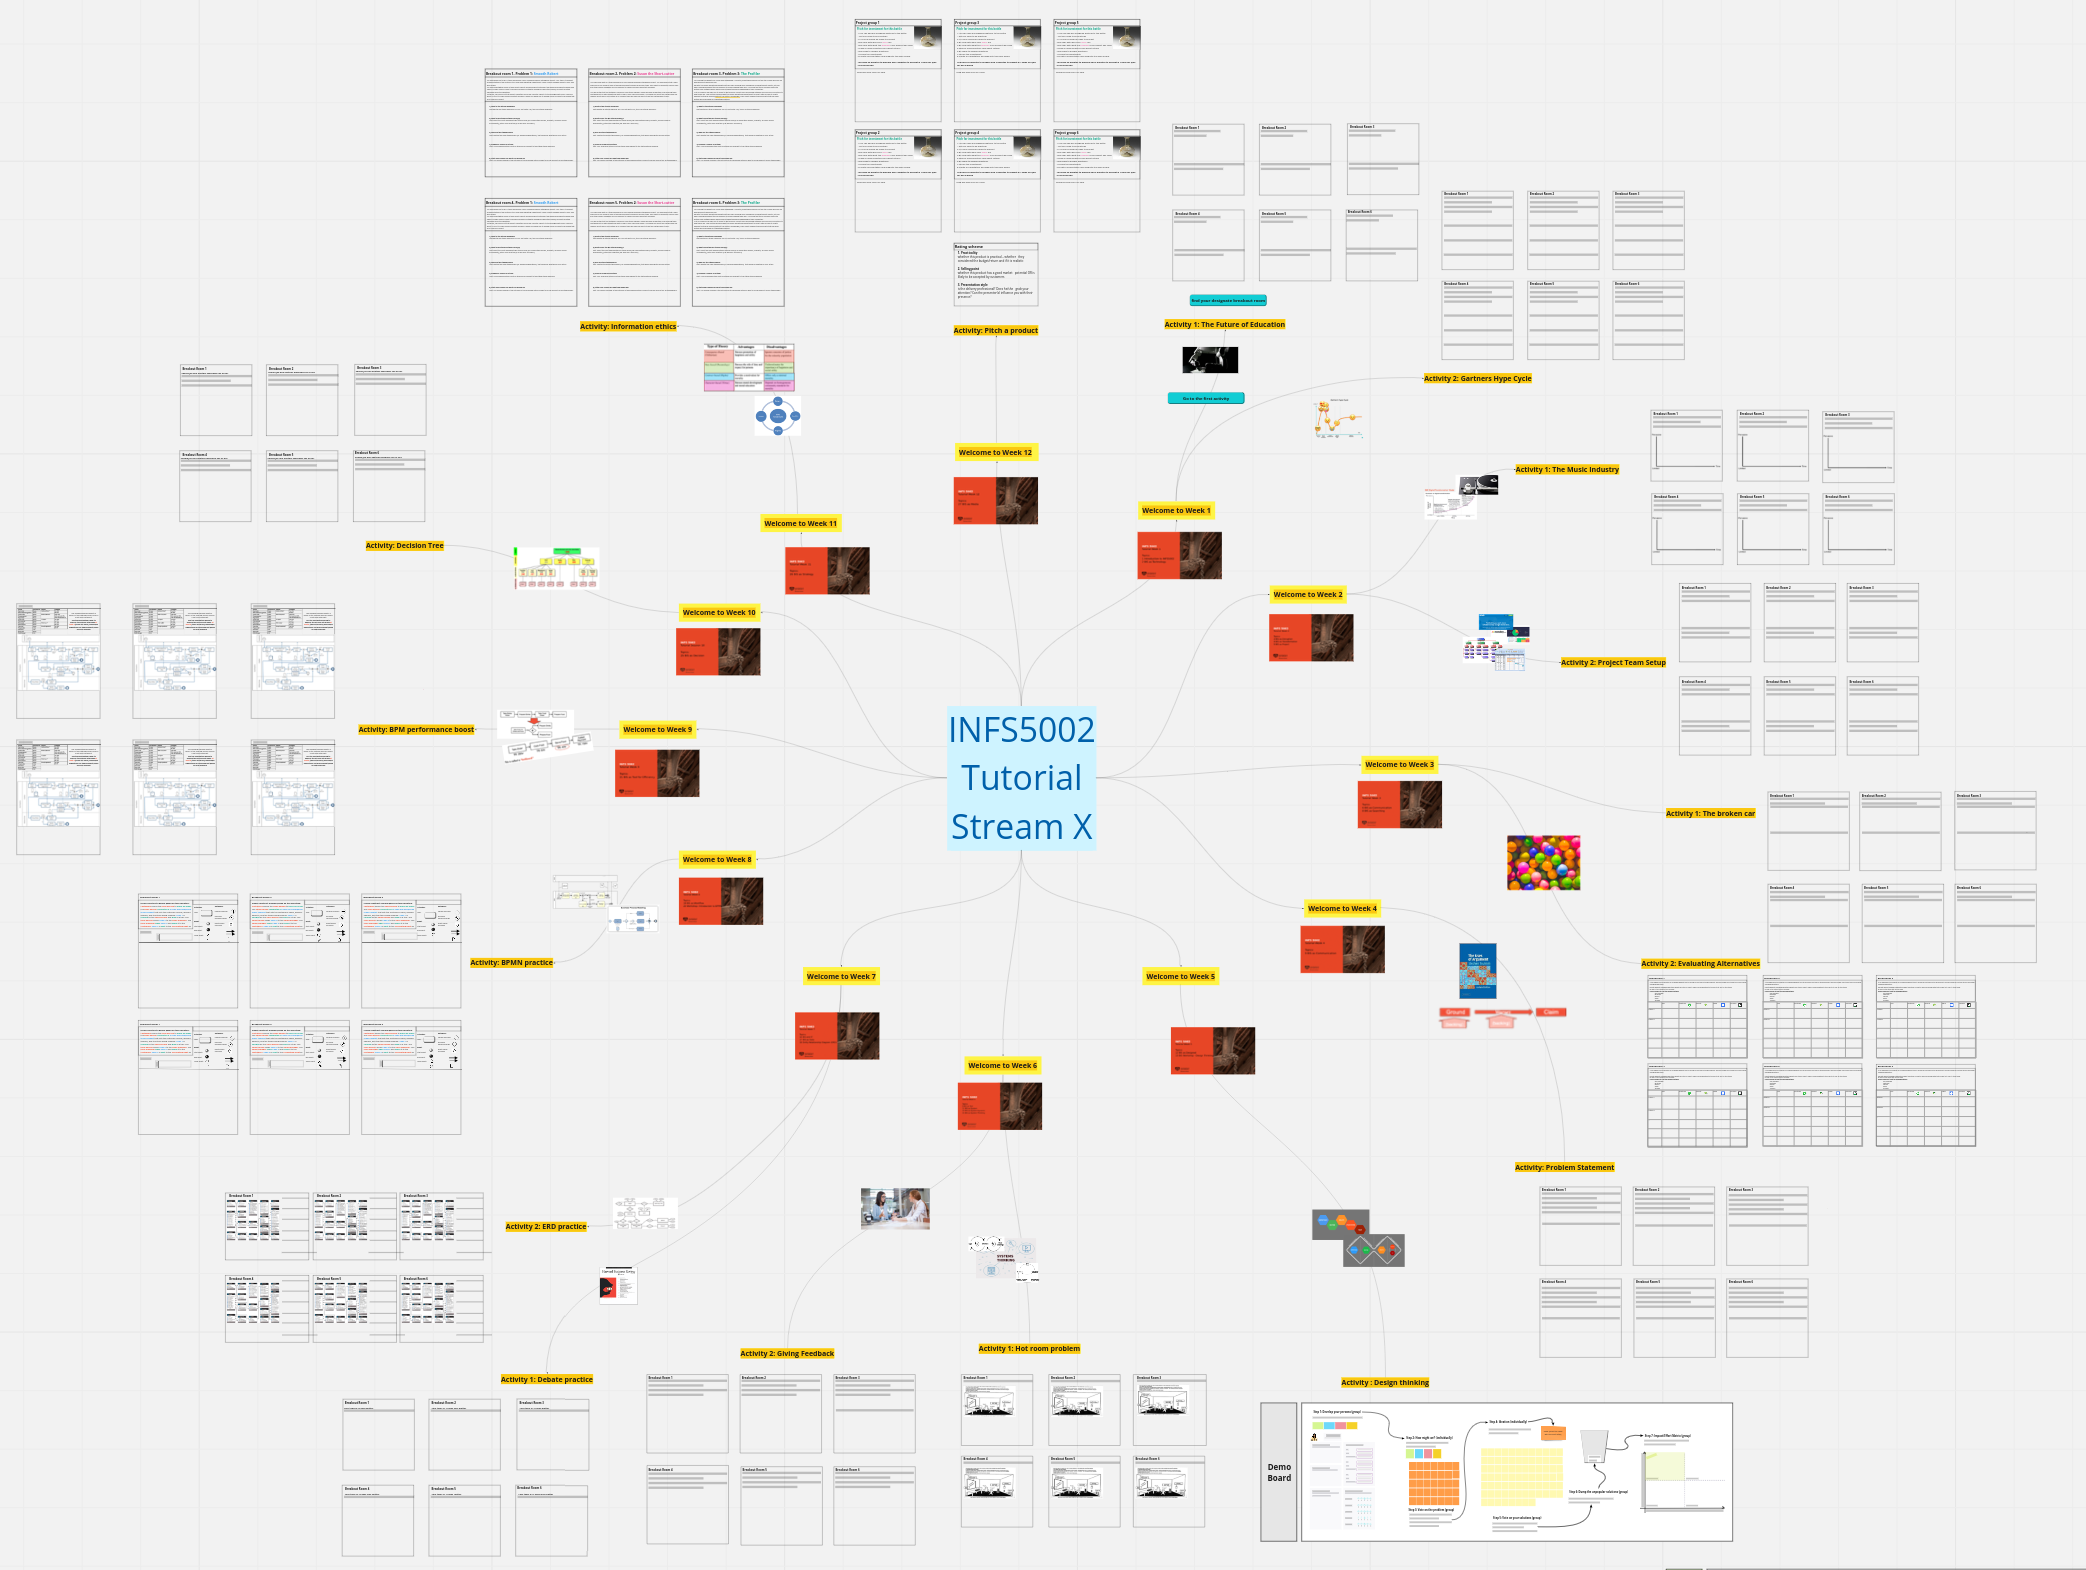
The unit’s board was laid out to include sections for every week of tutorial activities, structured around the centre like the numbers on a clock. Embedded lecture PowerPoint slides were the hub for each week, with one or two activities then linked for students to work on.
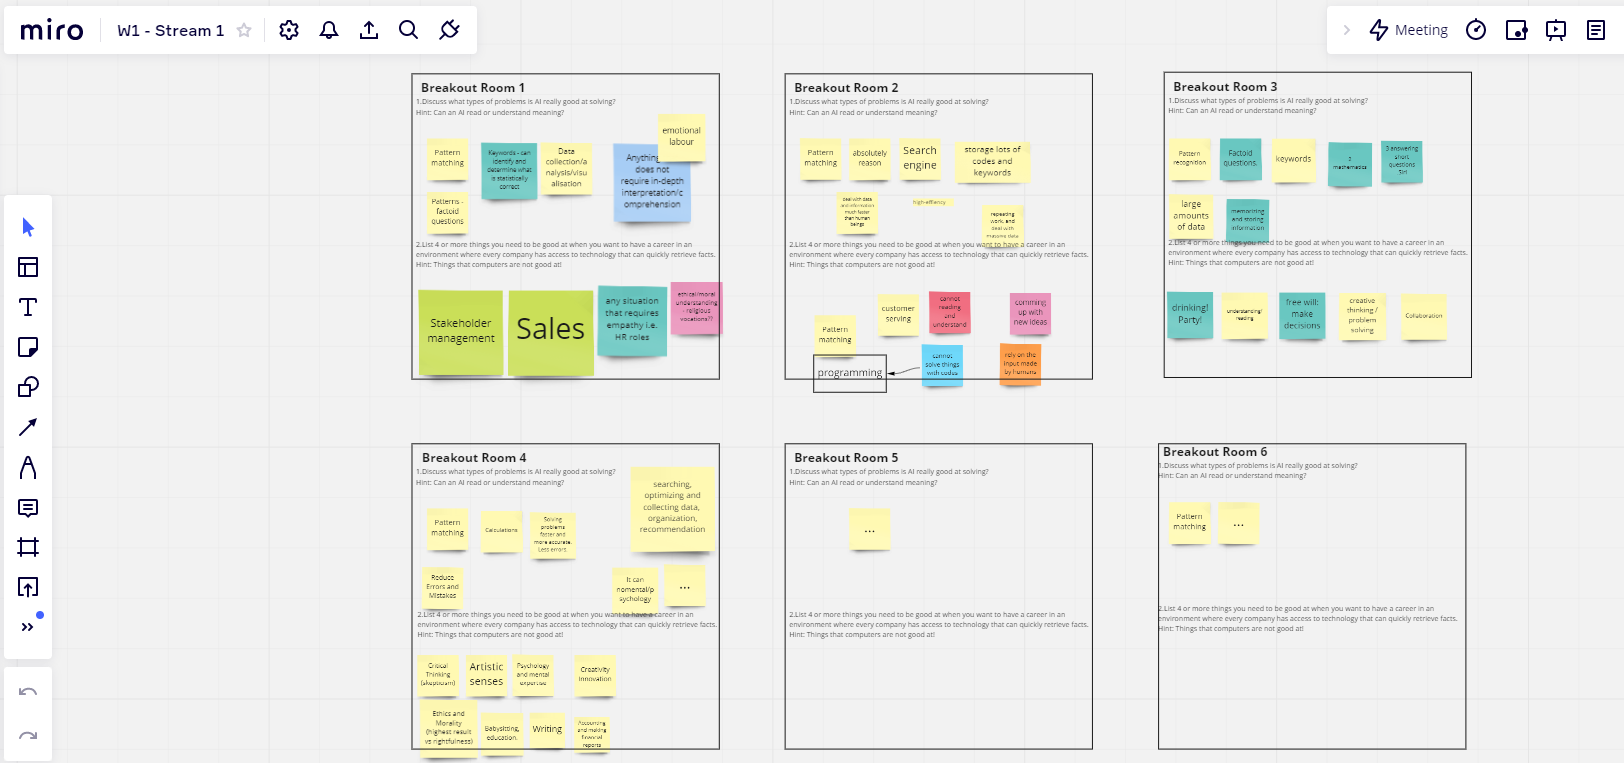
Within any given activity multiple copies of the instructions were made and numbered, allowing for separate groups to work independently on activities (Picture 3). Students then dragged and dropped post-it-notes onto the Miro board as they developed and discussed their ideas. Monitoring the appearance of post-it-note, my teachers and I could keep track of ideas and suggest additional angles for discussion. At the end of the activity it was easy to share and discuss cohort-wide insights.
Having all activities on a single board had several advantages. First, students could easily navigate to their collaborative workspace throughout the semester as the link stayed consistent. Second, students could revisit earlier work, which was particularly helpful when they were asked to write reflective pieces on their personal learning journey. And third, students were encouraged to learn from each other as they reviewed how different groups engaged with a given task.
Using Miro in your unit
The Miro board shown in the second image above was created over the course of a semester. For their first time using the tool an educator can build the board throughout a semester as activities are added week-on-week. Indeed, it is easy to try out Miro for a single activity and later copy it onto another board. An additional feature of Miro is to lock instructions into place. This makes it very easy to ‘wipe’ student-created notes off the board for re-use, and ensures that key directions aren’t mistakenly moved around.
We found that students had no problem in learning how to use Miro and to navigate the board – it was quite intuitive. The Business Co-Design team created a three-minute video explaining the elements of the board, reviewed by students before the first class (available in resources below). You could also show students elements of the setup in class; we found that not much time was necessary for this.
Setting up a Miro board for a given week follows a simple pattern for educators:
- Develop a set of tasks for students, such as a set of questions around a particular reading or an exercise.
- Create a frame on the Miro board and add instructions onto it. The frame should provide sufficient space for students to develop their answers, such as space to drag and drop post-it notes. You could provide one post-it-note as a starting point to guide students in answering.
- Create as many copies of the workspace as you will have groups in-class.
- Select all your workspaces and lock them in place to prevent them from being accidentally changed or moved during class.
Resources
- To get started with Miro,
sign up with your University email and request a (free) educational account. Normally these are approved within a day. - This video prepared by the Business Co-Design Team will be helpful in introducing Miro to your students. Note that students do not need to sign up for their own accounts.
- Read through the Miro Resources for more suggestions and guides on the platform.